Friday, July 1, 2016

JULY 4TH CRAFT INSPIRATION!


TRY THESE IDEAS FOR JULY 4TH  DECOR & TABLE CENTERPIECES!


I made this quick July 4th wreath last year and plan to reuse it this year!

Need:

Wire clothes hanger
Plastic red, white, & blue table cloths
Ruler
Scissors
Wreath door hanger


Cut each table cloth into 6 inch strips 
and keep each color in  separate bundles.
Shape wire hanger into a circle. Tie strips around circle in alternating colors ( red, white,then blue, repeating sequence) until circle is completely filled. Place wreath
hanger on front door. Add your pretty
July 4th wreath.
  

Tablecloth Wreath Tutorial


QUICK TIN CAN CRAFTS:


TIN CAN LUMINARIES  LINK:

www.thecraftycrow.net


TIN CAN SILVERWARE HOLDERS LINK

www.favecrafts.com


TIPS: 

These painted cans will still look great without the handles & embellishments.
Red, White & Blue tin cans can also be 
filled with sand. Just add colorful pin wheels, straws,  flowers, or sparklers 
to each can.  This makes great decor
for centerpiece or tablescape.


 JULY 4TH NAPKIN RINGS LINK


www.creativejewishmom.com


TIPS:

*Great idea for cheap napkin rings for
paper or cloth napkins. Let kids do this craft because it will keep them busy while you are cooking or decorating. The toilet paper rolls can be decorated with markers, crayons, glitter glue, or stickers. 


*July 4th Duck Tape can also 
embellish the t.p. rolls.I have
seen them @ Walmart & crafts
stores.


Saturday, June 11, 2016

WEEK-END CRAFTS, DIY RING MAKER


I have produced a lot of crafts in the 
past 15 years! I did not know you could make your own rings. I discovered this 
after watching Deals on the Living Well Network. A lady used buttons, small beads, and gems to make her own rings. She said you can buy ring blanks! I was got excited and became ready to make my own rings.
I searched online and found a few craft supply companies had them in gold and silver for reasonable prices.  I bought
adjustable blanks because they were a
lot cheaper. They came packs of 10 and
20. The crafts stores in my area only had 
a few silver ring blanks.


Today’s week-end craft is DIY fashion rings.  You will need:


Ring blanks

Favorite buttons, small bead, or rhinestone gems

Glue sticks and glue gun

 Pliers (optional)


Select the beads, buttons, or gems you  want to use for your design. If you use buttons must remove plastic piece from
the back with pliers. I suggest trying a flower design for your first ring.


Apply glue to the pad of the ring blank. Quickly add your flower design on top of the glue. You can adjust the design before the glue hardens. A beginner make want to glue each bead or button one at a time.  It depends on your skill level.


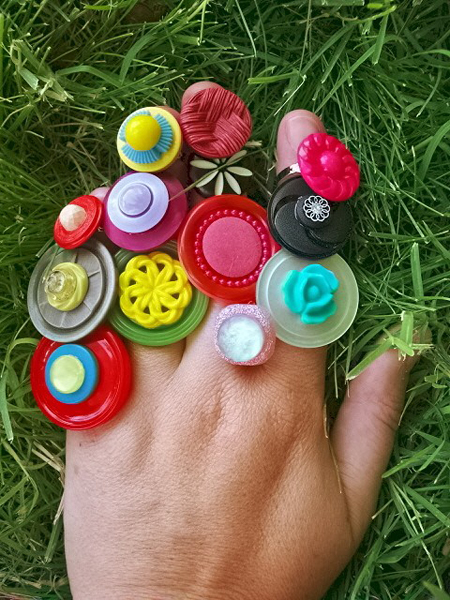
I have added some ring designs for your inspiration. There are also tips and  links
to websites where the ring blanks can be
purchased.


Here are images of the rings I made:


USED RHINESTONES AND BEADS ON GOLD RING BLANK


 1. I USED BAND AND ADDED CHARMS

(BAND & CHARMS FROM A.C. MOORE'S) 
2. I MADE STRETCH RING USING 
GREY & BLACK BUTTON &  
SMALL WHITE PEARL & BLACK BEADS


I USED FILIGREE CHARM & ADDED TINY
CLEAR RHINESTONE IN CENTER


ONLINE BUTTON RING DESIGNS


LINKS TO WEBSITES SELLING RING BLANKS


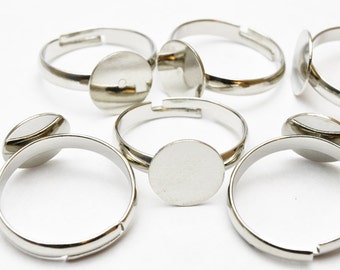
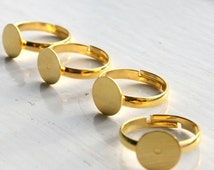
TYPES OF RING BLANKS


SILVER PLATED ADJUSTABLE RING BLANKS


SILVER PLATED ADJUSTABLE RING BLANKS

10 MM PAD


SIEVE RING BLANK


GOLD PLATED ADJUSTABLE RING BLANK


TIPS:


Most ring blanks adjust from size 5
to size 10.


Blanks available in packs of  10, 2O, & 100


MM RING MEASUREMENTS:

Size 5½

16.1 mm

Size 6

16.5 mm

Size 7

17.3 mm

Size 6½

16.9 mm

Size 8

18.1mm

Size 9

19.0 mm

Size 7½

17.7 mm

Size 8½


BUTTON RING TUTORIAL